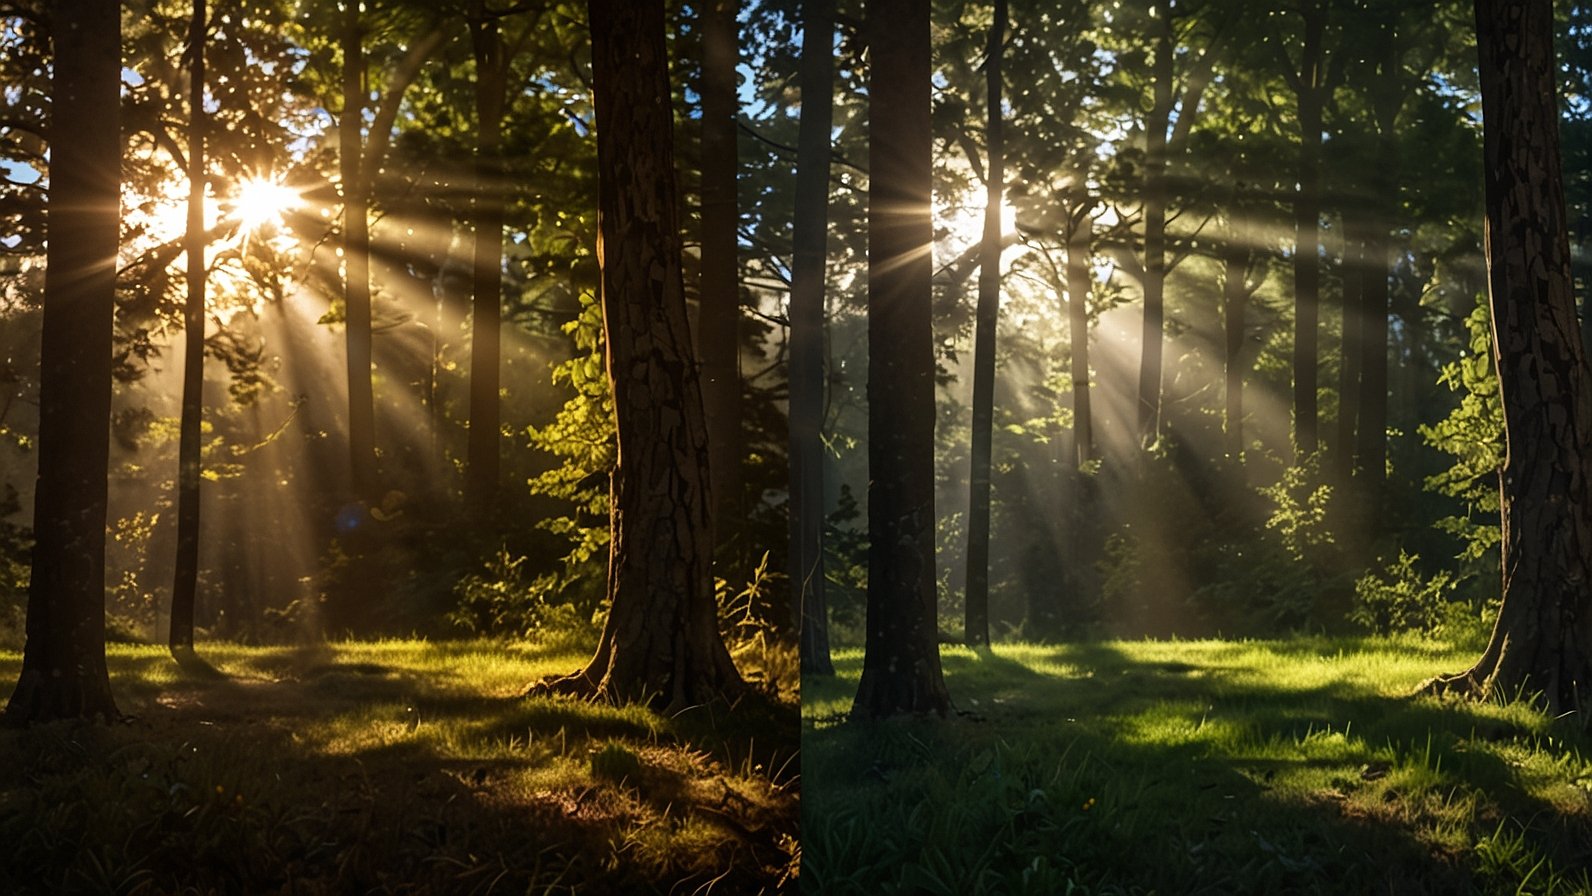
Ever spent hours trying to add a perfect lens flare to your photo, only to end up with a weird, fake-looking blob of light that ruins the whole shot? You’re not alone. For years, getting a realistic lens flare meant either getting incredibly lucky with your in-camera shot or possessing the patience of a saint in Photoshop. But what if you could just… paint with light?
Imagine having a dedicated lighting director for your photographs, one who knows exactly how light bends, reflects, and blooms inside a camera lens. That’s the magic we’re talking about today. We’re diving into Photeeq Lens Flare, a game-changing plugin that puts stunning, hyper-realistic light effects right at your fingertips, safely and without the hassle.
This isn’t about slapping on a generic filter. It’s about intentional, artistic enhancement. It’s about transforming a good photo into a storytelling, mood-filled masterpiece. Ready to stop fighting your editing software and start creating with confidence? Let’s get into it.
What Exactly is Photeeq Lens Flare?
Think of Photeeq Lens Flare not as a filter, but as a sophisticated digital lens kit. It’s a plugin designed for popular photo editors that uses real-world optical physics to generate authentic lens flare effects. Unlike simple overlay PNGs or basic filter apps, Photeeq calculates how light would genuinely interact with glass elements, creating unique flares that look like they were captured in-camera.
The core idea is creator-first. This means every feature is built for control, precision, and, most importantly, non-destructive editing. You’re never permanently altering your original photo. You’re adding a flare on its own layer, which you can tweak, change, or remove entirely at any point. It’s the safety net that lets creative professionals experiment fearlessly.
Why Your Photos Crave a Realistic Lens Flare
So, why bother? A well-placed lens flare does more than just make a photo look “cool.” It’s a powerful storytelling device.
- It Creates Mood and Atmosphere: A warm, soft flare can evoke nostalgia, romance, or a dreamy summer afternoon. A sharp, bright flare can feel energetic, futuristic, or intense.
- It Directs the Viewer’s Eye: The human eye is naturally drawn to light. You can use a lens flare to create leading lines, highlight your main subject, or add a focal point to an otherwise flat image.
- It Adds a Cinematic Quality: Movies use lens flare all the time to build depth and a sense of grandeur. By incorporating this effect, your still photographs can tap into that same cinematic language, making them feel more dynamic and like a frame from a bigger story.
- It Balances Composition: A strategically placed flare can fill an empty area of your frame, correcting compositional imbalances and creating a more harmonious image.
Getting Started with Your First Photeeq Flare
Convinced? Awesome. Using Photeeq Lens Flare is famously intuitive, which is a big part of its appeal. Here’s how you can create your first masterpiece.
- Install and Open: After installing the plugin into your preferred host (like Photoshop or Lightroom), open your image and launch Photeeq from the filters menu.
- Choose Your Flare: Browse the library of preset flares. These are based on real lens types (anamorphic, vintage, modern, etc.). Pick one that matches the vibe you’re going for.
- Position the Source: This is the most crucial step. Click and drag the “source” point to the origin of light in your image (e.g., the sun, a bright streetlamp). The plugin will automatically generate the flare from that exact spot.
- Customize to Perfection: This is where the magic happens. Don’t just settle for the preset!
- Adjust the brightness, scale, and rotation of the entire flare.
- Tweak individual elements of the flare—the streaks, the halos, the secondary reflections—using the detailed control sliders.
- Change the color and tint to perfectly match the lighting and white balance of your photo.
- Blend and Render: Use the blending modes and opacity controls to seamlessly integrate the flare into your image. When it looks perfect, hit apply, and it will render onto a new layer in your project, keeping your original photo safe.
Photeeq Lens Flare vs. The Old-School Methods
Let’s be real: there are other ways to add flare. But how do they really compare? Let’s break it down in a simple table.
| Method | Pros | Cons |
|---|---|---|
| In-Camera | Perfectly authentic, no editing needed. | Requires specific lighting conditions, can be unpredictable, high risk of ruining the shot. |
| Basic PNG Overlays | Quick, cheap, easy to find. | Often look fake, low resolution, no customization, difficult to blend realistically. |
| Manual Photoshop Brushes | High level of control, can be unique. | Extremely time-consuming, requires advanced skill, easy to look amateurish. |
| Photeeq Lens Flare Plugin | Realistic, highly customizable, non-destructive, fast, easy to use, professional results. | Premium cost (but a huge time-saver for professionals). |
As you can see, while other methods have their place, Photeeq Lens Flare offers the best balance of authenticity, control, and efficiency, especially for creators who need reliable, high-quality results.
5 Quick Takeaways to Master Mood with Light
Before you go, let’s cement this knowledge. Here’s what you need to remember.
- Start Subtle: It’s easier to add more effect than to pull it back. Begin with a lower intensity and build up.
- Match the Light Source: Your flare’s color temperature and direction must logically match the existing light in the photo. A warm sunset flare won’t look right in a photo taken at blue hour.
- Respect Your Composition: Use the flare to enhance your subject, not hide it. Place it intentionally to guide the viewer’s eye through the frame.
- Play with Blending Modes: “Screen” is a common starting point, but don’t be afraid to experiment with “Linear Dodge (Add)” or “Soft Light” for different effects.
- It’s a Tool, Not a Crutch: A great lens flare elevates a great photo. It can’t fix a poorly composed or exposed image. Use it with purpose.
The world of photo editing is always evolving, and tools like Photeeq Lens Flare are leading the charge by giving artists more power and less frustration. It’s about working smarter, not harder, to bring your creative vision to life.
So, what do you think? Are you ready to paint with light and add that cinematic punch to your portfolio? We’d love to hear about your experiences in the comments below!
You May Also Read: Gramhir Pro: AI Image Generation for Professionals
FAQs
Q: Is Photeeq Lens Flare a standalone app or a plugin?
A: It is primarily a plugin that works inside host applications like Adobe Photoshop, Affinity Photo, and others. This allows for a seamless, non-destructive workflow.
Q: Will it work on my computer?
A: Most likely! Photeeq lists its system requirements clearly, but it’s designed to be compatible with both Windows and macOS systems running standard photo editing software.
Q: Can I create my own custom flare presets?
A: Absolutely! Once you’ve customized a flare to perfection, you can save all your settings as a new preset. This is a huge time-saver if you develop a signature style.
Q: Is it possible to overuse lens flare?
A: Like any powerful effect, yes. The goal is enhancement, not overpowering. The best lens flares are the ones people don’t even notice as an “effect”—they just feel the mood it creates.
Q: How does it compare to the built-in lens flare in my editor?
A: Most built-in flare filters are very basic, offering little customization and often producing dated, unrealistic results. Photeeq is built on advanced optical algorithms for far greater realism and control.
Q: Is it safe for professional work?
A: Yes. Its non-destructive nature and high-quality output make it a reliable and safe tool for professional photographers and retouchers who can’t afford to compromise their original files.