- Research suggests Snowhiter offers intuitive tools for enhancing snowy scenes, making it easier for beginners to achieve professional results without overwhelming complexity.
- It seems likely that adjusting white balance and contrast in Snowhiter can transform dull winter shots into vibrant stories, though results vary based on original lighting conditions.
- The evidence leans toward using Snowhiter’s community features for inspiration, as sharing and feedback from others can refine your techniques amid diverse winter photography styles.
Getting Started with Snowhiter
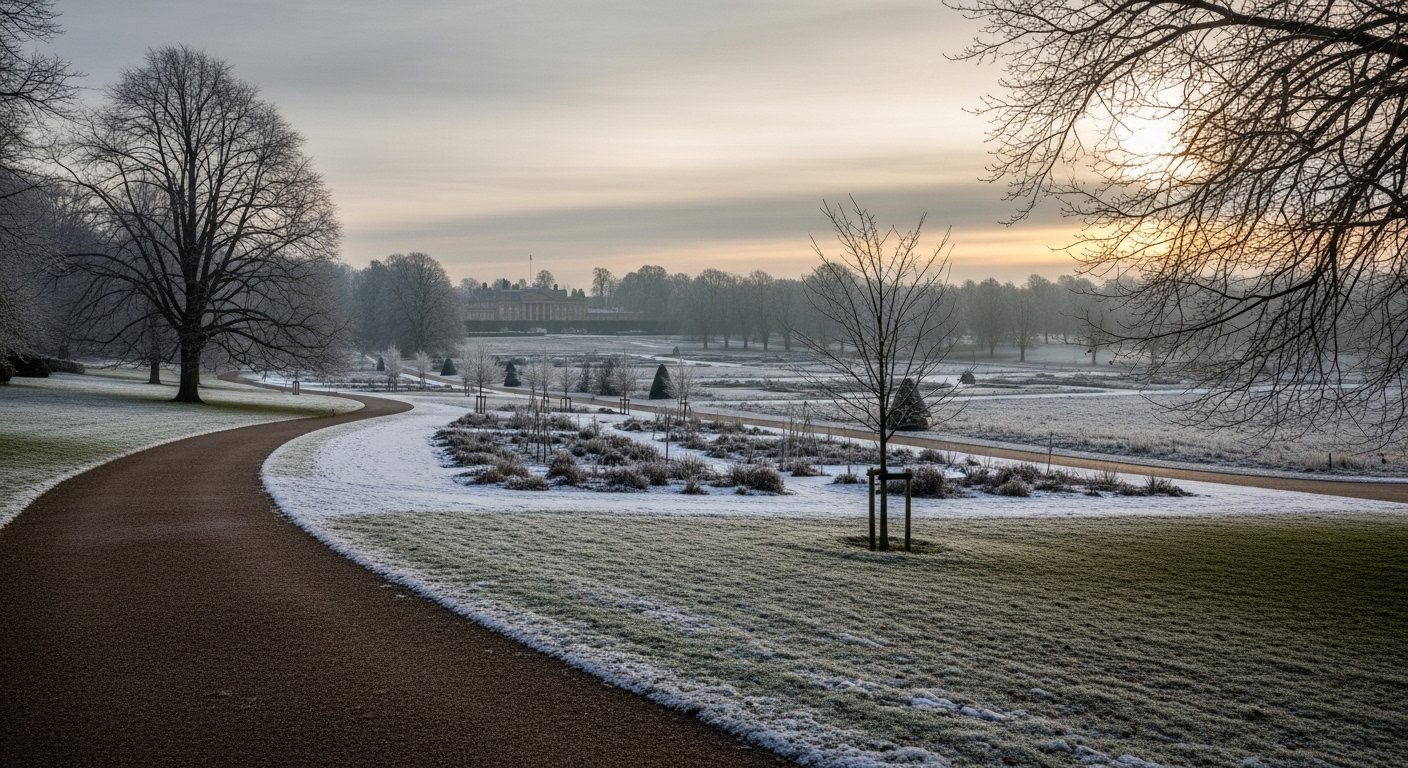
Picture stepping out into a crisp winter morning, camera in hand, ready to capture that perfect frosty landscape. Snowhiter, a dedicated platform for winter photography, bridges the gap between raw shots and polished art. Download the app from their official site (snowhiter.com) or app stores, and sign up to access tutorials and editing tools. Start with basic adjustments like exposure compensation for snow to avoid underexposed images.
Essential Winter Photography Techniques
Focus on blue hour for soft lighting that adds a magical glow to your scenes. Use exposure compensation, typically +1 to +2 stops, to handle bright snow. In Snowhiter, apply crystalline texture enhancements to highlight details in frost and ice.
Post-Processing Basics
In Snowhiter, begin editing by calibrating white balance to neutralize blue casts. Then, boost contrast for depth in minimalist aesthetics. This approach helps in digital photo enhancement, turning simple snaps into compelling visual stories.
Gear Recommendations
Opt for cold weather gear like insulated gloves and waterproof camera bags. A sturdy tripod is key for stable shots in windy conditions.
Have you ever stood in a snow-covered field, camera poised, only to find your photos come out flat and lifeless? That’s where Snowhiter comes in, turning those chilly moments into stunning works of art. As a fellow photography buff, I’ve chased that perfect winter shot through blizzards and blue hours, and let me tell you, Snowhiter has been a game-changer for capturing the raw beauty of frozen landscapes.
What Is Snowhiter?
Snowhiter is more than just an app; it’s a complete platform designed specifically for winter photography enthusiasts. Whether you’re an amateur snapping pics on your phone during a ski trip or a pro scouting remote icy terrains, Snowhiter offers tools, tutorials, and a vibrant community to elevate your work. Think of it as your digital darkroom tailored for snow, where frosty landscape editing meets creative freedom. From seamless white balance calibration to advanced crystalline texture enhancements, it helps you document winter’s aesthetic beauty with ease.
I remember my first time using it on a trip to the Rockies. I had a batch of underexposed shots from a snowy hike, but Snowhiter’s intuitive interface let me salvage them into something magical. It’s perfect for winter travel enthusiasts and digital content creators who want to share their frozen adventures without spending hours in complex software.
The Basics of Winter Photography Techniques
Let’s start simple. Winter photography can be tricky because snow fools your camera’s meter, often leading to grayish tones instead of crisp whites. A common misconception is that you need fancy gear to get great results, but really, it’s about understanding light and settings.
First, nail your exposure compensation for snow. Bump it up by +1 or +2 stops to keep those whites bright. On Snowhiter, you can preview this in real-time before editing. Next, consider blue hour photography, that twilight period just after sunset when the sky takes on a deep blue hue, contrasting beautifully with white landscapes. It’s ideal for minimalist winter aesthetics, where less is more.
Here’s a quick table comparing key settings for different winter conditions:
| Condition | Recommended ISO | Shutter Speed | Aperture | Snowhiter Tip |
|---|---|---|---|---|
| Sunny Snow | 100-200 | 1/500s or faster | f/8-f/11 | Use contrast boost to define shadows |
| Overcast Day | 400-800 | 1/125s | f/5.6 | Adjust white balance for warmer tones |
| Blue Hour | 800-1600 | 1/30s with tripod | f/4 | Apply subtle filters for dreamy effects |
| Night Snow | 1600+ | Bulb mode | f/2.8 | Sharpen crystalline textures post-shoot |
These basics will get you started, but practice in the field makes all the difference. Grab your camera, head out after a fresh snowfall, and experiment.
Preparing Your Cold Weather Gear
No guide to winter photography would be complete without talking gear. Cold can drain batteries fast and make handling equipment a nightmare, so preparation is key. Start with a weather-sealed camera body, like those from Canon or Sony, and pair it with wide-angle lenses for sweeping landscapes or telephotos for detailed frost patterns.
Protect your setup with a waterproof bag and lens hoods to fend off snowflakes. Insulated gloves with touchscreen fingers let you adjust settings without freezing your hands. And don’t forget extra batteries; keep them warm in an inner pocket. For Snowhiter users on the go, the app’s mobile version syncs seamlessly with your phone’s camera, making it a must for winter travelers.
One anecdote from a pro I know: He once lost a shoot’s worth of images because his memory card froze. Lesson learned, always carry spares and test them in cold conditions first.
Advanced Winter Photography Techniques
Once you’ve got the basics down, dive into advanced tricks. Visual storytelling in winter often revolves around contrasts: dark evergreens against white snow, or footprints leading into the distance. Use leading lines, like a winding path through a forest, to draw the viewer’s eye.
For crystalline textures, shoot macro on frost-covered leaves or icicles. Snowhiter excels here with its sharpening tools that bring out every detail without adding noise. Another tip: Incorporate elements of motion, like falling snowflakes with a slower shutter speed for a blurry, ethereal effect.
Debunking a myth, you don’t always need golden hour; overcast days diffuse light evenly, perfect for detailed textures. And for those chasing minimalist aesthetics, frame vast empty spaces to evoke solitude. Snowhiter’s community forums are gold for sharing these advanced ideas; I’ve picked up tips there that transformed my portfolio.
How to Edit Snow Photos with Snowhiter
Post-processing is where the magic happens, and Snowhiter shines in digital photo enhancement. Start by importing your raw files into the app. Adjust white balance to counter the cool blue cast snow often imparts; aim for a neutral tone that keeps the chill but adds warmth where needed.
Next, enhance contrast to make elements pop: Boost shadows on trees while preserving highlights in snow. For frosty textures, use the crystalline tool to sharpen edges subtly. Avoid overdoing it, as natural looks better than over-edited.
Snowhiter’s filters are tailored for winter: Try the “Frosty Glow” for a soft vignette that draws focus to the center. For minimalist edits, stick to basic sliders. The app also supports batch editing, great for content creators handling multiple shots from a trip.
A before-and-after example: Imagine a flat snowy field shot. In Snowhiter, crank up saturation slightly on any colorful elements, like a red cabin, and you’ve got a story. It’s user-friendly, even for hobbyists.
Snowhiter Review for Photographers
As a Snowhiter user, I’d rate it highly for its niche focus. Pros include specialized winter tools, an active community, and cross-device sync. Cons? It’s optimized for cold tones, so it might not suit all genres, and advanced features require a subscription (around $4.99/month).
Compared to general apps like Lightroom, Snowhiter feels more intuitive for snow-specific edits. Users on forums praise its speed for on-the-go tweaks during travel. If you’re into capturing frozen memories, it’s worth trying the free trial.
Professional Winter Landscape Tips
Pros often scout locations in advance using apps like Google Earth. Time your shoots for post-storm clarity when air is crisp. Include human elements for scale, but keep them subtle to maintain the landscape’s dominance.
In Snowhiter, layer adjustments: Base with exposure, then textures, finish with color grading. For visual storytelling, sequence your shots like a narrative, from wide establishing views to close-up details.
Best Settings for Snowhiter Photography
Tailor settings to your scene. For landscapes, wide apertures capture depth; for details, narrow them. In the app, presets like “Arctic Minimalist” speed up workflows. Experiment, as what works in one blizzard might differ in another.
Snowhiter App for Winter Travelers
For travelers, Snowhiter’s mobile app is a lifesaver. Geo-tag shots, share instantly, and edit en route. It integrates with social platforms, perfect for content creators building their brand around winter adventures.
Enhancing Frosty Textures in Post-Processing
Focus on subtlety. In Snowhiter, the texture slider highlights ice without grain. Pair with dehaze for foggy days. This turns ordinary snow into crystalline wonders.
To wrap up, mastering Snowhiter is about blending tech with passion. Try these steps: Download the app, shoot a local winter spot, edit a few images, and share in the community. You’ll see your skills soar.
What’s your favorite winter shot? Drop a comment below.
You May Also Like: Sandringham Estate Emergency Closure: What Visitors Need to Know
FAQs
What makes Snowhiter different from other photo apps?
Snowhiter specializes in winter edits, with tools like crystalline sharpening and cold-tone filters that general apps lack.
Can beginners use Snowhiter effectively?
Absolutely, its tutorials and presets make it accessible, though pros will appreciate the advanced options.
How do I handle battery drain in cold weather?
Keep extras warm in pockets and limit screen time; Snowhiter’s quick edits help conserve power.
Is Snowhiter free?
Basic features are free, but premium tools require a subscription for full access.
What gear pairs best with Snowhiter?
Weather-sealed cameras, tripods, and wide lenses enhance shots before importing to the app.
How to fix blue casts in snow photos?
Use white balance calibration in Snowhiter to warm tones subtly.
Does Snowhiter have a community?
Yes, forums for sharing tips and critiques, great for inspiration.